HELP TO MY BELOVED ARTISTS
HELP TO MY BELOVED ARTISTS
References is the artist best friend!!!
so here it is some resources for you to use! Please share, so you can help more artist uwu.
i can update this post if i find new things.
LAY FIGURE:
JustSketchMe
Magic Poser Web
Design Doll (this one isn't online, and you have to download)
Easy Pose on Steam (this one isn't a free app, and is more focused on "anime art style")
3D MODEL:
Female body - Sketchfab
Male body - Sketchfab
a lot of poses - POSEMANIACS
Reference Angle
Head Construction - guidelines - by Marc Brunet.
BACKGROUND:
Room Sketcher
SketchUp
BLOGS THAT HELP A LOT:
this amazing post made by starrify-everything
Pose Reference
BONUS:
this amazing hands brushes made by poxamarquinhos
a lot of pinterest bases
More Posts from Basket-of-references and Others


U use colors in such a enrichening way, how do you do that may I ask??
thank you so much! 💕
this answer is going to be a little long.
the first thing, i think, is that it's very common to think of color as a means to an end, as just another type of information about a drawing: i'm using brown on the hair to show that the hair is brown, i'm using green to show that the characters are standing in grass.
but if color is information, then we can use it to say a lot more than just the basic facts of a drawing!
if you love drawing but want to get better with color, you have to learn to love color, too.
to want to know everything about how color works, to explore what different colors mean to you, to try and try and try again.
because, and this is the kicker:
ALL COLORS ARE RELATED TO EACH OTHER!

[from this post about how to use a color wheel]
i think it's common for people to talk about complementary colors and that's helpful when you're starting out with coloring, but i feel that it can become very limiting when it's treated like a rule and can obscure the fact that all colors are related to each other. it's called a color wheel because there is no beginning or end!

for example, take this drawing:

in this drawing, i'm using colors from all over:

but by just rearranging them slightly and throwing them against a black background like in the drawing, you can see how they're actually relating to each other and not nearly as random as they may seem at first glance!

[these notes are from this post where i break down how muted or "ugly" colors pull an image together] all colors are related to each other in some way, and that means that
YOU MUST DETERMINE WHAT EACH COLOR MEANS TO YOU, AND IT IS YOUR RESPONSIBILITY TO CONVEY THAT MEANING TO YOUR AUDIENCE.


for example, to me green can be uncomfortable and overwhelming, energetic and edgy, calm and natural, or fearful and tense. but no matter how it makes me feel, it's my responsibility to convey my relationship to green to whoever even glances at my drawing.
sure you can use commonly held ideas about colors [red = angry, blue = sad], but this shorthand is also limiting. if everyone used these commonly held ideas about color, there would be no room for experimentation or interesting, wild color choices! and colors mean different things to everyone-- that's what makes everyone's colorful art so different and so cool!!
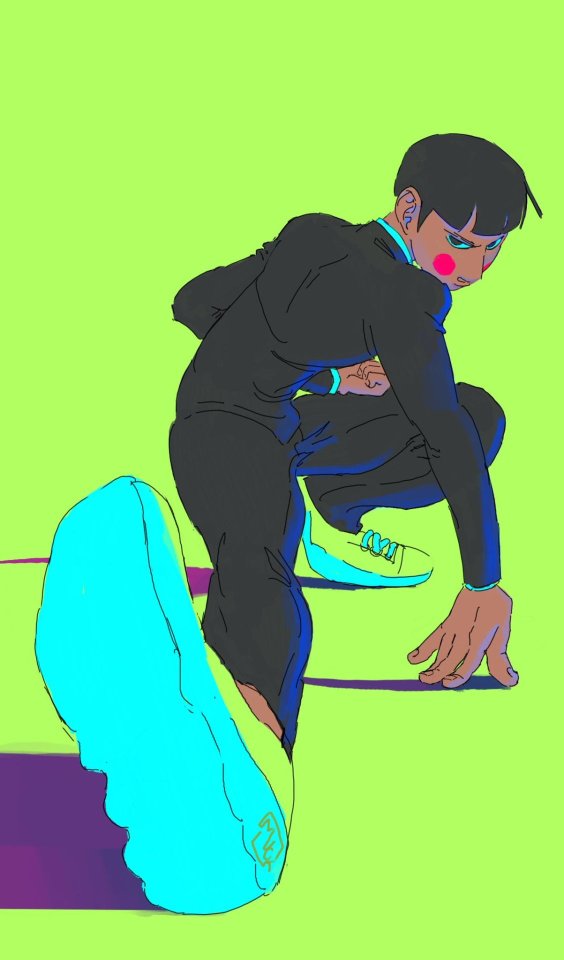
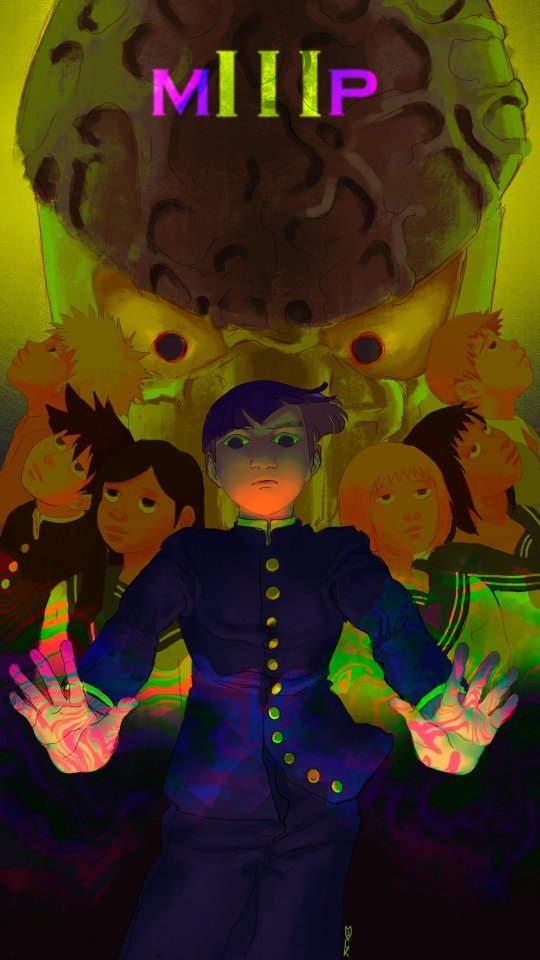
another thing to note about those green drawings: each one is using a specific type of green.
the one with reigen leans blue-green, which creates a cool-colored image. meanwhile, reigen is warmer tones, which almost makes it seem like he's overheating when he's thrown against such a cool-toned background, which further expresses his discomfort!
the dimple!mob drawing is like a sprite or mountain dew-green, which encourages the feeling of electricity or energy. it's a cool yellowish-green.
the one of mob floating is a warmer yellowish-green, to suggest sunny warmth without drawing sun rays.
the divine tree arc drawing is a lot of reddish-greens, which can suggest a sickliness.
experiment with color combinations and different shades and hues! explore what these different types of colors mean to you!
so now let's get into the nitty gritty of color choice. the following images are from my free pdf about color, composition, and intuitive drawing:


the main takeaways from these pages are:
consider simplifying your colors! more colors does not necessarily equal a better drawing.
see how much a single color can do! can you use it in multiple places on your drawing? what meaning can you ascribe to the colors you're using?
consider creating a concept for your colors and a few rules to guide your piece! a lot of great drawings can fall apart because the coloring concept was too vague or because there weren't enough rules or guidelines to keep the image coherent.
are your colors saturated enough? are the different colors you're using fighting for the viewer's attention? do you have focal points in your art, and if so, are the colors you're using reinforcing those focal points?
use the tools at your disposal! color-picking, color balance, overlay layers. it can feel important to try to prove something by hand-picking every color, but even when i hand-pick my colors i almost always check them with color balance anyway to make sure i'm picking the best colors possible.
YOU DO NOT HAVE TO SUFFER FOR ART. PLEASE use everything that is available to you, and make sure that you are aligned with what brings you joy when you're making art!
i wanted to show an example of a drawing i've done that is doing way too much vs a drawing that is simpler but more balanced:


on the left, the colors are interesting but the background is too strong and is competing with the actual drawing for attention. on the right, the clear background and simple coloring create a cute, easy to read, successful image! this is what i mean when i say that colors can fight for the viewer's attention and mess up a good drawing.
my final secret is that i rarely shade with or use white, black, or grays. i don't think this is a rule that you have to follow, but i like it because it pushes me to figure out what colors will go best with each other, and i think this single tip has strengthened my understanding of color immensely. however, there are a lot of beautiful art styles that shade with and use pure white, black, and gray. you have to decide what you love!
and
STUDY!!!
look at other people's art, color pick it, and make a palette based on their art! look at how they represent values through color, how they shade, etc. study your favorite artists' work!! you will learn so much!!
i hope this was helpful! if you have any more follow-up questions or if there's something that you want to know that i didn't explain here, please don't hesitate to ask!
i hate that every time i look for color studies and tips to improve my art and make it more dynamic and interesting all that comes up are rudimentary explanations of the color wheel that explain it to me like im in 1st grade and just now discovering my primary colors
5 editor’s secrets to help you write like a pro
1. Sentences can only do one thing at a time.
Have you ever heard a four-year-old run out of breath before she can finish her thought? I edit a lot of sentences that work the same way. You need a noun, you need a verb, you might need an object. Give some serious thought to stopping right there.
Sentences are building blocks, not bungee cords; they’re not meant to be stretched to the limit. I’m not saying you necessarily want a Hemingway-esque series of clipped short sentences, but most writers benefit from dividing their longest sentences into shorter, more muscular ones.
2. Paragraphs can only do one thing at a time.
A paragraph supports a single idea. Construct complex arguments by combining simple ideas that follow logically. Every time you address a new idea, add a line break. Short paragraphs are the most readable; few should be more than three or four sentences long. This is more important if you’re writing for the Web.
3. Look closely at -ing
Nouns ending in -ing are fine. (Strong writing, IT consulting, great fishing.) But constructions like “I am running,” “a forum for building consensus,” or “The new team will be managing” are inherently weak. Rewrite them to “I run,” “a forum to build consensus,” and “the team will manage.” You’re on the right track when the rewrite has fewer words (see below).
(If for some insane reason you want to get all geeky about this, you can read the Wikipedia article on gerunds and present participles. But you don’t have to know the underlying grammatical rules to make this work. Rewrite -ing when you can, and your writing will grow muscles you didn’t know it had.)
4. Omit unnecessary words.
I know we all heard this in high school, but we weren’t listening. (Mostly because it’s hard.) It’s doubly hard when you’re editing your own writing—we put all that work into getting words onto the page, and by god we need a damned good reason to get rid of them.
Here’s your damned good reason: extra words drain life from your work. The fewer words used to express an idea, the more punch it has. Therefore:
Summer months Regional level The entire country On a daily basis (usually best rewritten to “every day”) She knew that it was good. Very (I just caught one above: four-year-old little girl)
You can nearly always improve sentences by rewriting them in fewer words.
5. Reframe 90% of the passive voice.
French speakers consider an elegantly managed passive voice to be the height of refinement. But here in the good old U.S. (or Australia, Great Britain, etc.), we value action. We do things is inherently more interesting than Things are done by us. Passive voicemuddies your writing; when the actor is hidden, the action makes less sense.
Bonus: Use spell-check
There’s no excuse for teh in anything more formal than a Twitter tweet.
Also, “a lot” and “all right” are always spelled as two words. You can trust me, I’m an editor.
Easy reading is damned hard writing. ~ Nathaniel Hawthorne


I find monthly art challenges exhausting, but also love a little structured kick in the ass, so for the past month and a half I've been setting weekly challenges for myself. First one: fill a sketchbook page a day with quick poses off Pose Maniacs.
It's a redux of my first figure drawing class exercise as a teen: get from the top of the head to the heel of the foot in the allotted time. All the poses above were 10-30 seconds. Never hurts to get back to basics every so often~
(Although, in that first class, the professor made us go outside and grab twigs that we had to dip in ink to draw with, so we wouldn't get precious about our line work. I'm not THAT ascetic this time around, lol.)
![[1] Color Zones Of The Face [Tried To Find Source, I Think It’s Here ]](https://64.media.tumblr.com/82181df6330fcb3655a2e40c6c43287a/tumblr_or5nykhGCu1sm0kjdo1_500.png)
![[1] Color Zones Of The Face [Tried To Find Source, I Think It’s Here ]](https://64.media.tumblr.com/1703500f3e1292e370eda4d4cb761252/tumblr_or5nykhGCu1sm0kjdo2_1280.jpg)
[1] Color Zones of the Face [Tried to find source, I think it’s here ]
[2] Navate’s Skin Chart Supplement – the actual tutorials are: Section I: Skin Basics & Section II: Skin tones
Two brilliant skin tutorials. Do not use flat colors for skin! Underpainting is important for realistic, vivid skin. Remember, underneath your skin is fat, muscles, red blood, blue veins, bones.
Consider reblogging this to support the original artist. I recommend following them as well!
More Helpful links: Ask a Question/Request a Tut | Submit a Tutorial | Promote Your Art Commissions to +18.3 K Dashes | Stay Updated on DeviantArt! | Visit me @astrikos
art cheats
hello i am here today to not lose track of the art cheats i have discovered over the years. what i call art cheat is actually a cool filter/coloring style/way to shade/etc. that singlehandedly makes art like 20 times better
80’s anime style
glitch effect
glow effects
adding colors to grayscale paintings
foreshortening ( coil )
foreshortening ( perspective )
clipping group (lines)
clipping group (colors)
dramatic lighting ( GOOD )
shading metal
lighting faces
that is all for today, do stay tuned as i am always hunting for cool shit like this
Hello! I hope you dont mind me asking, but how do you draw those amazing black and white comics? (Coffee and The Goddess comics come to mind!) I love the way you do them and would love to know the process you go thru!
this is a pretty broad question and im guessing/hoping you meant “how do you color in black and white in your comics” so have a few random tips about values and paneling and stuff i guess


thank you
received a few asks about how i draw tf characters and so finally i sat down and started scratching out some notes :))
i'll add more later on if more people are interested and when i have some time,, but i hope these are somewhat informative ?? of at least my own thought processes when it comes to drawing the robot guys


-
 auravyrn liked this · 2 months ago
 -
 ardaozcan liked this · 4 months ago
 -
 ewpukeatronic liked this · 6 months ago
 -
 labannori liked this · 11 months ago
 -
 dgsaaron liked this · 1 year ago
 -
 abigator123 liked this · 1 year ago
 -
 the-aviatrix liked this · 1 year ago
 -
 the-knitted-orange-hat reblogged this · 1 year ago
 -
 jyamyam liked this · 1 year ago
 -
 c-chanfromda liked this · 1 year ago
 -
 unelsurrere liked this · 1 year ago
 -
 desibaka0055 liked this · 1 year ago
 -
 ilovedtoomuchdidnti reblogged this · 1 year ago
 -
 marymarvels-blog liked this · 1 year ago
 -
 bulbasaurlife reblogged this · 1 year ago
 -
 resbox reblogged this · 1 year ago
 -
 lore597 reblogged this · 1 year ago
 -
lore597 liked this · 1 year ago
-
 glacialispictorem liked this · 1 year ago
 -
 joycryptid liked this · 1 year ago
 -
 lllena liked this · 1 year ago
 -
 theultimatestranger liked this · 1 year ago
 -
 crowdoesart21 reblogged this · 1 year ago
 -
 martialwriter liked this · 1 year ago
 -
 lunareel liked this · 1 year ago
 -
 minmiami liked this · 1 year ago
 -
 glazzyglaz liked this · 1 year ago
 -
 val022 liked this · 1 year ago
 -
val022 reblogged this · 1 year ago
-
 masterxyakoh reblogged this · 1 year ago
 -
masterxyakoh liked this · 1 year ago
-
 b1ttrcup liked this · 1 year ago
 -
 goldfishontheceiling liked this · 1 year ago
 -
 happy-little-nightmares reblogged this · 1 year ago
 -
 sunshadraws reblogged this · 1 year ago
 -
 mandageban reblogged this · 1 year ago
 -
mandageban liked this · 1 year ago
